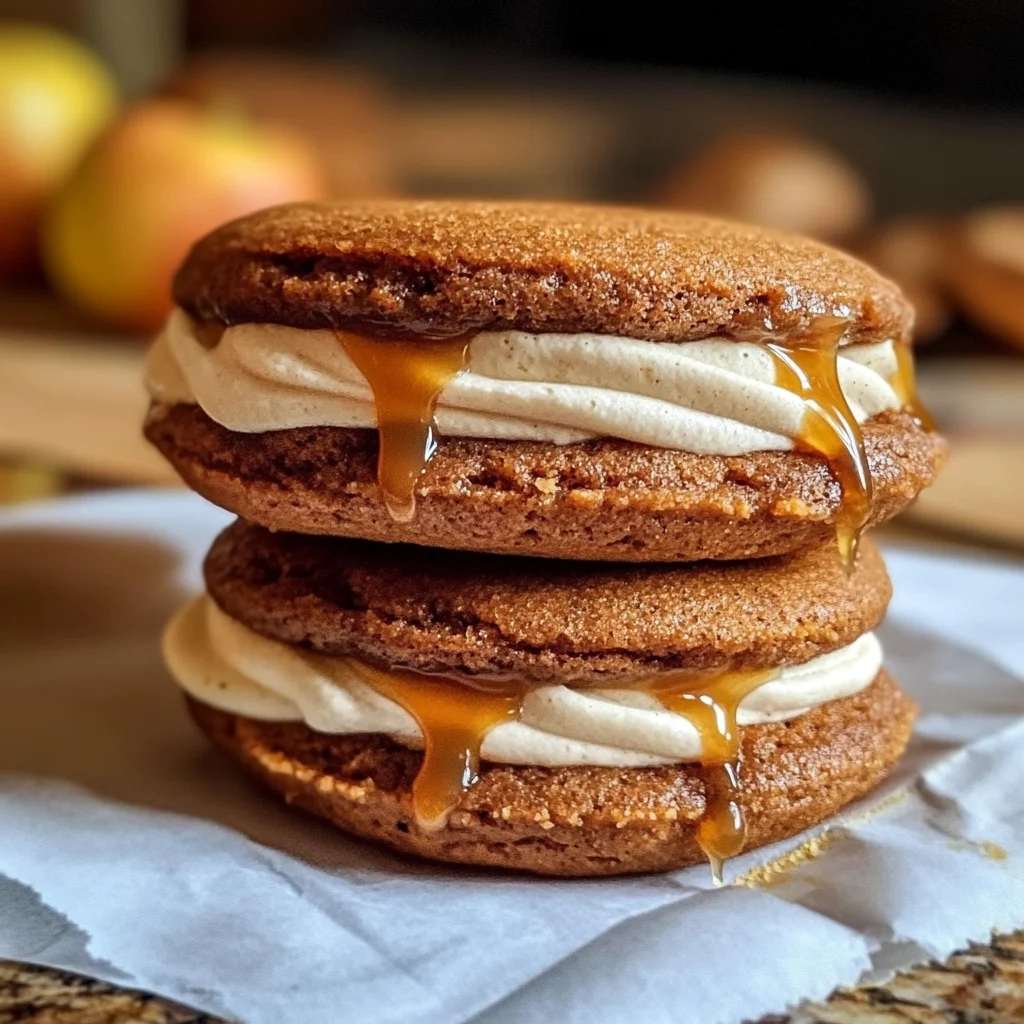
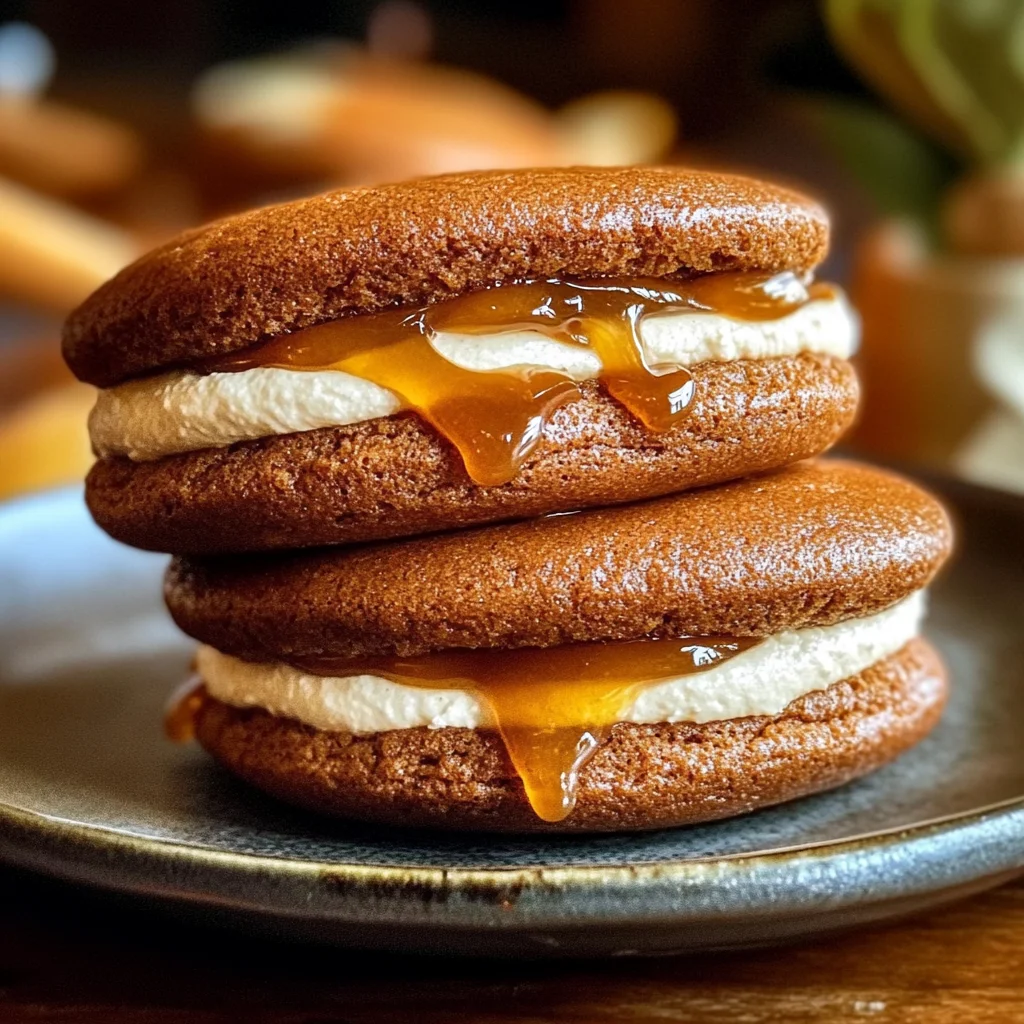
Apple Cider Whoopie Pies
If you’re looking for a delightful treat that captures the essence of fall, you’ve stumbled upon the perfect recipe! These Apple Cider Whoopie Pies are not just any dessert; they are a cozy hug in cookie form. With warm spices and a luscious caramel filling, each bite is like a celebration of autumn. Whether you’re hosting friends for a gathering or simply want to indulge during a quiet evening at home, these whoopie pies will surely become a favorite.
I love making these with my family during the weekends. The process of baking together creates lovely memories, and the delicious aromas wafting through the kitchen are simply irresistible. Plus, they’re easy enough for even beginner bakers to tackle!
Why You’ll Love This Recipe
- Perfectly Spiced: The combination of cinnamon, nutmeg, and cloves brings the warmth of fall right into your kitchen.
- Family-Friendly Fun: Kids love helping out in the kitchen, especially when it comes to assembling these tasty sandwiches!
- Make-Ahead Delight: You can prepare the whoopie pie halves in advance and fill them just before serving for extra freshness.
- Customizable Treats: Feel free to get creative with the fillings or toppings—there’s no wrong way to enjoy them!
Ingredients You’ll Need
These Apple Cider Whoopie Pies come together with simple, wholesome ingredients that you might already have in your pantry. Let’s take a look at what you’ll need to whip up these delightful treats!
For the Whoopie Pies:
- 2 ½ cups all-purpose flour
- 1 tsp baking soda
- 1 tsp baking powder
- ½ tsp salt
- 1 tsp ground cinnamon
- ½ tsp ground nutmeg
- ¼ tsp ground cloves
- ½ cup unsalted butter, softened
- 1 cup light brown sugar, packed
- 1 large egg, room temperature
- 1 tsp vanilla extract
- 1 cup apple cider, reduced to ¼ cup (boil down 1 cup until it reduces)
- ½ cup whole milk
For the Apple Cider Buttercream:
- ½ cup unsalted butter, softened
- 3 cups powdered sugar
- ¼ cup reduced apple cider (see note above)
- 1 tsp vanilla extract
- Pinch of salt
For the Caramel Filling:
- ½ cup store-bought caramel sauce (or homemade if you prefer)
- Pinch of flaky sea salt (optional)
Variations
This recipe is wonderfully flexible, allowing you to personalize it to your taste. Here are some ideas to switch things up:
- Switch up the spices: If you prefer other flavors, try adding ginger or cardamom for an extra kick.
- Use different fillings: Instead of caramel sauce, consider using chocolate ganache or whipped cream for a twist.
- Add nuts: Chopped pecans or walnuts can add great texture and flavor if you’re a fan of nuts.
- Make mini versions: Use a smaller scoop for bite-sized whoopie pies that are perfect for sharing.
How to Make Apple Cider Whoopie Pies
Step 1: Reduce the Apple Cider
Start by making the apple cider reduction. Pour 1 cup of apple cider into a saucepan and simmer over medium heat until it reduces to ¼ cup. This should take about 10-15 minutes. Reducing it intensifies its flavor and sweetness. Once done, let it cool while you prepare the whoopie pie batter.
Step 2: Make the Whoopie Pies
Preheat your oven to 350°F (175°C) and line two baking sheets with parchment paper. In a medium bowl, whisk together the flour, baking soda, baking powder, salt, cinnamon, nutmeg, and cloves. In a large bowl, beat the butter and brown sugar together until light and fluffy—this step is key for achieving that wonderful texture! Add the egg and vanilla extract, mixing until combined. Gradually mix in your cooled apple cider reduction. Then add the dry ingredients in thirds while alternating with milk—this helps create a light batter! Use a cookie scoop or tablespoon to drop 2-tablespoon-sized rounds onto your prepared sheets. Bake for 10-12 minutes or until firm to touch; then transfer them onto a wire rack to cool completely.
Step 3: Prepare the Buttercream
In another medium bowl, beat your softened butter until creamy and smooth—that’s what makes this buttercream so luscious! Gradually add in powdered sugar followed by your cooled apple cider reduction, vanilla extract, and salt. Beat until everything is combined into a fluffy frosting.
Step 4: Assemble the Whoopie Pies
Now comes the fun part! Pair up your whoopie pie halves by size. Pipe or spoon on a generous amount of apple cider buttercream onto one flat side of each pie half. Drizzle with caramel sauce; if you’re feeling fancy sprinkle some flaky sea salt on top! Gently press on another half to create your whoopie pie sandwich. Repeat until all pies are assembled.
And there you have it—delicious Apple Cider Whoopie Pies ready to enjoy!
Pro Tips for Making Apple Cider Whoopie Pies
Baking these delightful whoopie pies can be a fun experience, and with a few helpful tips, you’ll ensure they turn out perfectly every time!
-
Use Room Temperature Ingredients: Bringing your butter, egg, and milk to room temperature helps create a smoother batter that results in lighter, fluffier cakes.
-
Don’t Overmix the Batter: Mixing just until combined prevents the whoopie pies from becoming tough. Overmixing activates the gluten in the flour too much, leading to denser cookies.
-
Cool Completely Before Assembling: Allowing the whoopie pie halves to cool completely ensures that the buttercream and caramel filling won’t melt or slide off when you assemble them.
-
Experiment with Flavor Add-Ins: Feel free to add chopped nuts or dried fruits like cranberries for an extra burst of flavor and texture. Just keep the proportions balanced so that they don’t overwhelm the main ingredients.
-
Make Ahead and Freeze: These whoopie pies freeze well! Prepare them in advance, then store them in an airtight container. Thaw at room temperature before serving for a tasty treat anytime.
How to Serve Apple Cider Whoopie Pies
Serving these Apple Cider Whoopie Pies can be just as fun as making them! With a little creativity, you can present them in a way that delights your guests.
Garnishes
- Cinnamon Sugar Dusting: Lightly sprinkle some cinnamon sugar on top of each assembled whoopie pie for a sweet finishing touch.
- Caramel Drizzle: Add an extra drizzle of caramel sauce on top for an indulgent look and taste that complements the flavors beautifully.
- Chopped Nuts: A sprinkle of finely chopped walnuts or pecans adds both flavor and visual appeal, inviting everyone to take a bite!
Side Dishes
- Warm Apple Cider: Serve your whoopie pies with warm apple cider for a comforting autumn treat that brings out their apple flavor.
- Vanilla Ice Cream: A scoop of vanilla ice cream alongside each pie creates a delightful contrast of temperatures and textures.
- Fresh Fruit Salad: A light fruit salad featuring apples and pears can balance the sweetness of the whoopie pies, offering a refreshing bite.
- Cheese Platter: Pairing these desserts with soft cheeses like brie or mascarpone can enhance your dessert experience, providing a savory contrast to the sweetness.
Enjoy your cozy autumn baking! These Apple Cider Whoopie Pies are sure to become a favorite with family and friends alike.
Make Ahead and Storage
These Apple Cider Whoopie Pies are perfect for meal prep, allowing you to enjoy their delightful flavors throughout the week. They store well and can even be frozen for later enjoyment!
Storing Leftovers
- Store leftover whoopie pies in an airtight container at room temperature for up to 2 days.
- If you prefer them chilled, you can also refrigerate them for up to a week.
- Keep the filling separate if possible to maintain texture.
Freezing
- To freeze, wrap each whoopie pie individually in plastic wrap or foil.
- Place wrapped pies in a freezer-safe bag or container.
- They can be frozen for up to 3 months. When you’re ready to enjoy them, thaw overnight in the refrigerator.
Reheating
- For a warm treat, preheat your oven to 350°F (175°C).
- Place whoopie pies on a baking sheet and heat for about 5-10 minutes until warmed through.
- Enjoy them with a fresh drizzle of caramel sauce if desired!
FAQs
Here are some common questions about making Apple Cider Whoopie Pies.
Can I make Apple Cider Whoopie Pies without eggs?
Yes! You can substitute the egg with a flaxseed or chia seed egg. Mix 1 tablespoon of ground flaxseed or chia seeds with 2.5 tablespoons of water, let it sit until it thickens, and use it as an egg replacement.
How do I store Apple Cider Whoopie Pies?
To store your whoopie pies, place them in an airtight container at room temperature for up to 2 days or refrigerate them for a week. For longer storage, wrap them individually and freeze for up to 3 months.
What’s the best way to serve Apple Cider Whoopie Pies?
Serve these delicious whoopie pies at room temperature or warmed slightly in the oven. They pair wonderfully with a warm beverage like cider or tea!
Can I make the filling ahead of time?
Absolutely! You can prepare the apple cider buttercream and caramel filling in advance. Just keep them stored separately in airtight containers in the refrigerator until you’re ready to assemble.
What variations can I try with Apple Cider Whoopie Pies?
Feel free to experiment by adding chopped nuts or dried fruits into the batter, or try different flavored extracts in your buttercream for a unique twist!
Final Thoughts
I hope this recipe brings warmth and joy into your kitchen this autumn! The combination of spices, sweet apple cider, and creamy filling makes these whoopie pies truly special. As you bake, let the cozy scents fill your home, creating delightful memories with family and friends. Enjoy every bite, and don’t hesitate to share your creations—I can’t wait to hear how they turn out!
Apple Cider Whoopie Pies

Indulge in the cozy flavors of fall with our delightful Apple Cider Whoopie Pies. These spiced cookie sandwiches are filled with a rich apple cider buttercream and a drizzle of caramel, making them the perfect autumn treat. The warm aromas of cinnamon, nutmeg, and cloves fill your kitchen as you bake, creating an inviting atmosphere for family and friends. Easy enough for novice bakers to master, these whoopie pies promise sweet memories and delicious moments at every gathering. Whether served at a festive occasion or enjoyed on a quiet evening, they are sure to become a seasonal favorite!
- Prep Time: 30 minutes
- Cook Time: 12 minutes
- Total Time: 42 minutes
- Yield: Approximately 12 servings 1x
- Category: Dessert
- Method: Baking
- Cuisine: American
Ingredients
- 2 ½ cups all-purpose flour
- 1 tsp baking soda
- 1 tsp baking powder
- ½ tsp salt
- 1 tsp ground cinnamon
- ½ tsp ground nutmeg
- ¼ tsp ground cloves
- ½ cup unsalted butter, softened
- 1 cup light brown sugar, packed
- 1 large egg, room temperature
- 1 tsp vanilla extract
- 1 cup apple cider, reduced to ¼ cup
- ½ cup whole milk
- ½ cup unsalted butter, softened (for buttercream)
- 3 cups powdered sugar
- ¼ cup reduced apple cider
- 1 tsp vanilla extract (for buttercream)
- Pinch of salt (for buttercream)
- ½ cup store-bought caramel sauce
- Pinch of flaky sea salt (optional)
Instructions
- Preheat oven to 350°F (175°C). Prepare two baking sheets with parchment paper.
- In a bowl, combine flour, baking soda, baking powder, salt, and spices.
- In another bowl, beat butter and brown sugar until fluffy. Add egg and vanilla; mix well.
- Gradually mix in cooled apple cider reduction followed by dry ingredients alternating with milk.
- Scoop dough onto prepared sheets; bake for 10-12 minutes until firm. Cool completely.
- For filling, beat softened butter with powdered sugar and apple cider until fluffy.
- Assemble by spreading buttercream on one half, drizzling caramel, then topping with another half.
Nutrition
- Serving Size: 1 serving
- Calories: 210
- Sugar: 22g
- Sodium: 150mg
- Fat: 9g
- Saturated Fat: 5g
- Unsaturated Fat: 3g
- Trans Fat: 0g
- Carbohydrates: 32g
- Fiber: 1g
- Protein: 2g
- Cholesterol: 25mg