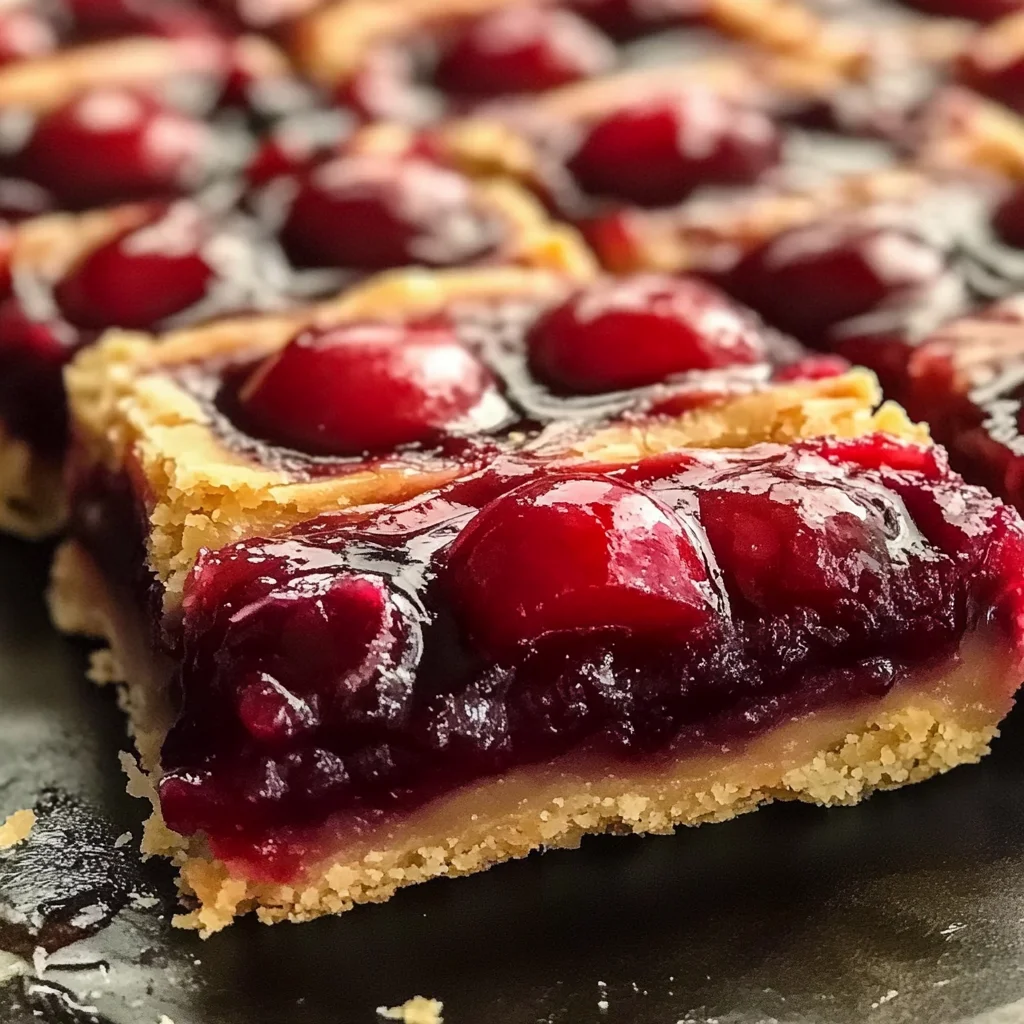
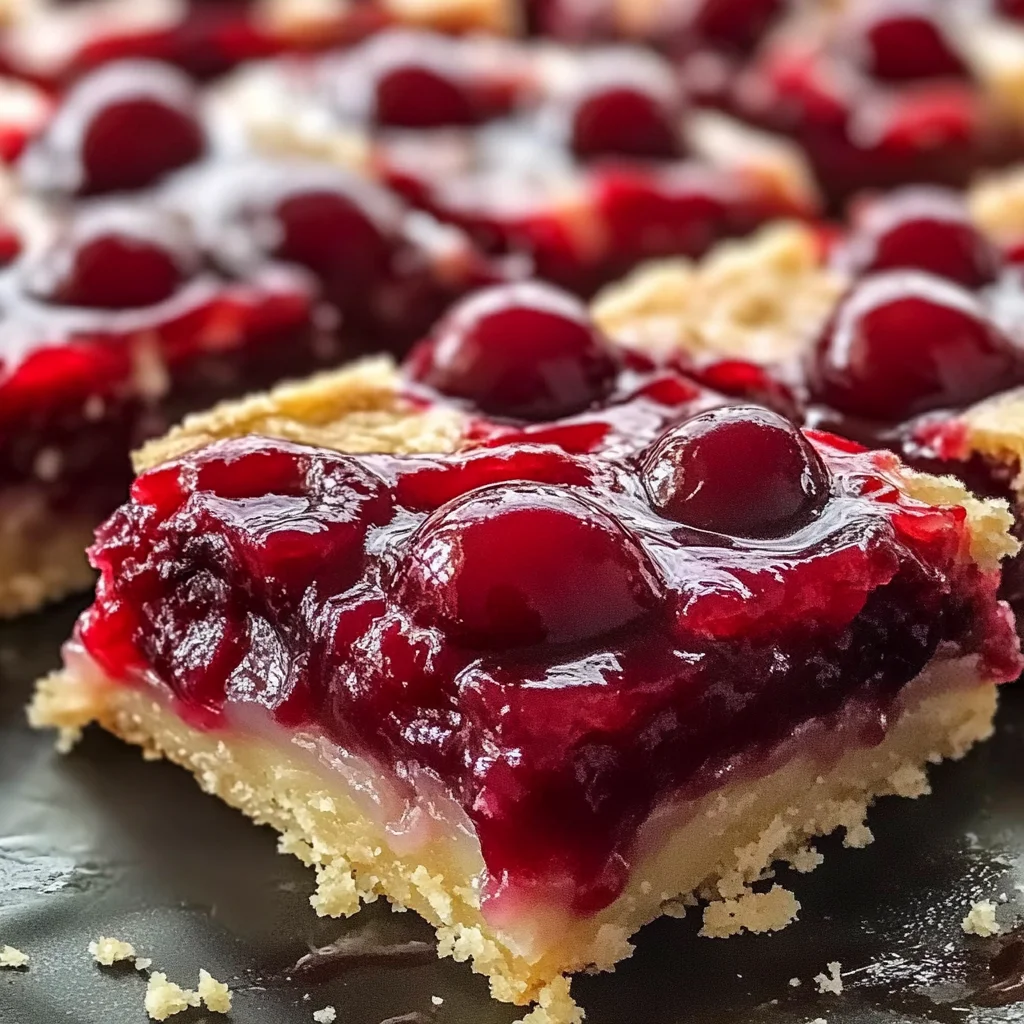
Easy Cherry Pie Bars: A Simple Cherry Dessert to Savor
If you’re looking for a delightful dessert that combines ease and flavor, then you’ve stumbled upon the perfect recipe! Easy Cherry Pie Bars: A Simple Cherry Dessert to Savor is not just any treat; it’s a nostalgic favorite that has been passed down in my family for years. Every bite is a burst of sweet and tart goodness, thanks to that luscious cherry filling. The hint of almond extract adds a special touch that elevates these bars from ordinary to unforgettable.
These cherry pie bars are perfect for any occasion—be it a busy weeknight when you need a quick pick-me-up or a family gathering where you want to impress your loved ones with something homemade. They’re also great for sharing with friends or bringing to potlucks. Trust me, once you try them, they’ll become your go-to dessert!
Why You’ll Love This Recipe
- Quick to Prepare: With just 15 minutes of prep time, you can whip these up without breaking a sweat.
- Family-Friendly: Kids and adults alike will adore these sweet treats, making them ideal for gatherings.
- Make-Ahead Convenience: Bake them ahead of time and store them for later—perfect for busy days!
- Deliciously Flavorful: The combination of cherries and almond creates a mouthwatering experience in every bite.
Ingredients You’ll Need
To create these easy cherry pie bars, all you need are some simple and wholesome ingredients that you likely already have in your pantry. Let’s gather everything together!
For the Bars
- 1 cup softened butter
- 1 cup sugar
- 2 large eggs, room temp
- 1 tsp almond extract
- 1 tsp vanilla extract
- 2 ½ cups all-purpose flour
- ½ tsp salt
- 1 (21 oz) can premium cherry pie filling
For the Glaze
- 1 cup confectioners’ sugar
- 1 tsp almond extract
- ½ tsp vanilla extract
- Milk as needed
Variations
One of the best parts about this recipe is its flexibility! Feel free to get creative with these delicious variations:
- Add nuts: Toss in some chopped walnuts or pecans for an extra crunch.
- Try different fruits: Swap out the cherry filling for blueberry or peach for a new twist.
- Make it chocolatey: Drizzle some melted chocolate on top for chocoholics!
- Go gluten-free: Substitute all-purpose flour with your favorite gluten-free blend.
How to Make Easy Cherry Pie Bars: A Simple Cherry Dessert to Savor
Step 1: Preheat the Oven
Start by preheating your oven to 350°F (175°C). This ensures that your bars bake evenly and turn out perfectly golden brown.
Step 2: Cream Butter and Sugar
In a mixing bowl, cream together the softened butter and sugar until it’s light and fluffy. This step is crucial because it helps incorporate air into the mixture, giving your bars a nice texture.
Step 3: Add Eggs and Extracts
Next, add in the eggs along with the almond and vanilla extracts. Mix until everything is well combined. The extracts will enhance the flavor profile of your bars beautifully!
Step 4: Combine Dry Ingredients
Mix in the flour and salt until just combined. Be careful not to overmix; we want soft, tender bars rather than tough ones.
Step 5: Press Half the Dough into the Pan
Press half of this dough into a greased baking pan evenly. This forms the base layer that holds all that delicious cherry filling.
Step 6: Add Cherry Filling
Spread the cherry pie filling evenly over the top of the dough layer. Don’t be shy—make sure it’s covered well so every bite has those juicy cherries!
Step 7: Dollop Remaining Dough on Top
Take spoonfuls of the remaining dough and dollop it over the cherry filling. It doesn’t have to be perfect; some gaps are fine since they’ll bake together beautifully.
Step 8: Bake
Place your pan in the preheated oven and bake for about 35–40 minutes until golden brown on top. Your kitchen will smell heavenly during this time!
Step 9: Cool and Glaze
Once baked, let your bars cool completely before drizzling with glaze made from confectioners’ sugar, almond extract, vanilla, and milk. This finishing touch makes them even more tempting!
Enjoy sharing these Easy Cherry Pie Bars: A Simple Cherry Dessert to Savor with friends and family—they’re sure to love them as much as I do!
Pro Tips for Making Easy Cherry Pie Bars: A Simple Cherry Dessert to Savor
Baking should be a joyful experience, and these tips will help you create the best cherry pie bars ever!
-
Use room temperature ingredients: Bringing your eggs and butter to room temperature ensures they blend smoothly, creating a light and fluffy texture in your bars.
-
Don’t skip the almond extract: This secret ingredient adds a delightful depth of flavor that perfectly complements the cherries. It’s the little touches that make a big difference!
-
Press the dough firmly: When you press half of the dough into the pan, make sure it’s packed down tightly. This creates a sturdy base that holds up to the cherry filling and prevents sogginess.
-
Check for doneness: Ovens can vary in temperature, so keep an eye on your bars as they bake. Look for a golden-brown color on top, and remember that they’ll continue to set as they cool.
-
Let them cool completely before slicing: Allowing your cherry pie bars to cool fully helps them firm up, making it easier to cut clean slices without making a mess.
How to Serve Easy Cherry Pie Bars: A Simple Cherry Dessert to Savor
These cherry pie bars are perfect for any occasion, and with just a few thoughtful touches, you can elevate their presentation!
Garnishes
- Powdered sugar dusting: A light sprinkle of powdered sugar adds an elegant touch without overpowering the flavors.
- Fresh cherries: Garnishing with fresh cherries not only looks beautiful but also reinforces that delicious cherry flavor.
- Whipped cream: A dollop of whipped cream on top offers a creamy contrast that makes every bite feel indulgent.
Side Dishes
-
Vanilla ice cream: The classic pairing! The creamy sweetness of vanilla ice cream contrasts wonderfully with the tartness of the cherry filling.
-
Greek yogurt: For a healthier option, serve with a dollop of Greek yogurt. Its tanginess complements the sweetness of the bars beautifully.
-
Coffee or tea: A warm cup of coffee or tea enhances the experience and makes for a cozy dessert moment, especially during chilly evenings.
-
Fruit salad: A fresh fruit salad provides a light balance to the richness of the pie bars and is an excellent way to incorporate seasonal fruits.
Enjoy making and serving these Easy Cherry Pie Bars! They’re sure to become a beloved treat in your home just like they are in mine. Don’t forget to share your creations with friends and family—you might inspire them to try their hand at baking too!
Make Ahead and Storage
These Easy Cherry Pie Bars are perfect for meal prep, allowing you to enjoy a sweet treat any day of the week! Whether you want to whip them up in advance for a gathering or simply want to have something delicious on hand, this recipe accommodates your needs perfectly.
Storing Leftovers
- Store leftover cherry pie bars in an airtight container at room temperature for up to 3 days.
- If you prefer them chilled, refrigerate for up to a week. Just allow them to come to room temperature before serving for the best flavor.
Freezing
- To freeze, cut the cooled bars into individual portions and place them in a single layer on a baking sheet.
- Once frozen solid, transfer them to a freezer-safe bag or container. They can be stored in the freezer for up to 2 months.
- When you’re ready to enjoy, simply thaw at room temperature or microwave briefly.
Reheating
- For warm cherry pie bars, preheat your oven to 350°F (175°C).
- Place the desired number of bars on a baking sheet and warm them for about 10-15 minutes until heated through.
- You can also microwave individual bars for about 15-20 seconds if you’re in a hurry!
FAQs
Here are some common questions readers might have about this delightful recipe.
Can I make these Easy Cherry Pie Bars ahead of time?
Absolutely! These bars store well and can be made ahead of time. Follow the storage tips mentioned above for optimal freshness.
What is the best way to store Easy Cherry Pie Bars?
Store the bars in an airtight container at room temperature or refrigerate them if you prefer them chilled. They’ll stay fresh and delicious!
Can I use fresh cherries instead of canned pie filling?
Yes! If you have fresh cherries on hand, you can make your own cherry filling by cooking pitted cherries with sugar and cornstarch until thickened.
How long do Easy Cherry Pie Bars last?
When stored properly, these bars can last up to 3 days at room temperature or up to a week in the fridge. They also freeze beautifully for later enjoyment!
Can I substitute almond extract with another flavor?
Certainly! If almond extract isn’t available or to your taste, vanilla extract works wonderfully as a substitute, maintaining that sweet flavor profile.
Final Thoughts
I hope this recipe brings as much joy to your kitchen as it has brought to mine over the years. The combination of sweet cherries and buttery crust creates something truly special that’s perfect for sharing with family and friends. Enjoy making these Easy Cherry Pie Bars: A Simple Cherry Dessert to Savor, and don’t hesitate to experiment with different toppings or fillings. Happy baking!
Easy Cherry Pie Bars: A Simple Cherry Dessert to Savor
Indulge in the delightful flavors of Easy Cherry Pie Bars: A Simple Cherry Dessert to Savor. These scrumptious bars combine a buttery, tender crust with a luscious cherry filling, making them the perfect treat for any occasion. With just a hint of almond extract, every bite is a perfect balance of sweet and tart that will transport you back to nostalgic family gatherings. Quick to prepare and even easier to share, these cherry pie bars are ideal for busy weeknights or potluck events. Whether enjoyed fresh out of the oven or chilled from the fridge, they are sure to impress friends and family alike.
- Prep Time: 15 minutes
- Cook Time: 35–40 minutes
- Total Time: 0 hours
- Yield: Approximately 12 servings 1x
- Category: Dessert
- Method: Baking
- Cuisine: American
Ingredients
- 1 cup softened butter
- 1 cup sugar
- 2 large eggs (room temperature)
- 1 tsp almond extract
- 1 tsp vanilla extract
- 2 ½ cups all-purpose flour
- ½ tsp salt
- 1 (21 oz) can premium cherry pie filling
Instructions
- Preheat your oven to 350°F (175°C).
- Cream together the softened butter and sugar in a mixing bowl until light and fluffy.
- Add the eggs, almond extract, and vanilla extract; mix until well combined.
- Gradually add flour and salt, mixing until just combined.
- Press half of the dough into a greased baking pan.
- Spread the cherry pie filling evenly over the dough base.
- Dollop spoonfuls of the remaining dough over the cherry filling.
- Bake for 35–40 minutes, until golden brown on top.
- Allow cooling completely before drizzling with glaze made from confectioners' sugar, almond extract, vanilla, and milk.
Nutrition
- Serving Size: 1 serving
- Calories: 215
- Sugar: 18g
- Sodium: 120mg
- Fat: 10g
- Saturated Fat: 6g
- Unsaturated Fat: 4g
- Trans Fat: 0g
- Carbohydrates: 30g
- Fiber: 1g
- Protein: 2g
- Cholesterol: 55mg