Cannoli Cookies
If you’re looking for a delightful twist on a classic dessert, you’ve come to the right place! Cannoli Cookies are my go-to treat when I want something that feels special but is still so easy to whip up. These little gems bring together the crispy goodness of cookies with the creamy delight of ricotta filling—what’s not to love? Whether it’s for a busy weeknight dessert or a sweet addition to family gatherings, these cookies will put a smile on everyone’s face.
What makes these Cannoli Cookies truly special is their versatility. You can enjoy them as a decadent treat after dinner or serve them at celebrations like birthdays and holidays. Trust me, they will disappear faster than you can say “cannoli”!
Why You’ll Love This Recipe
- Easy to Make: With simple steps and familiar ingredients, this recipe is perfect for both beginner bakers and seasoned pros.
- Family-Friendly Treat: Kids and adults alike will love the combination of flavors and textures in these Cannoli Cookies!
- Make-Ahead Convenience: You can prepare the dough in advance and bake the cookies when you’re ready for a sweet surprise.
- Deliciously Versatile: Feel free to customize your filling with different mix-ins or toppings based on your preferences.
Ingredients You’ll Need
Let’s gather some simple, wholesome ingredients that will come together beautifully in these Cannoli Cookies. You might already have most of these items in your pantry!
- 1 cup (240 ml) of all-purpose flour
- ½ cup (100 g) of granulated sugar
- ½ cup (120 g) of ricotta cheese
- 1 large egg
- 1 tsp of vanilla extract
- 1 tsp of lemon zest
- ½ cup (75 g) of mini chocolate chips
- ½ cup (75 g) of chopped pistachios
- Powdered sugar for dusting
Variations
One of the best things about Cannoli Cookies is how flexible they are! You can easily tweak the recipe to suit your taste preferences or dietary needs.
- Change up the nuts: Use chopped almonds or walnuts instead of pistachios for a different crunch.
- Add some spice: Mix in a pinch of cinnamon or nutmeg to elevate the flavor profile.
- Fruit infusion: Incorporate dried fruits like raisins or cranberries for a chewy surprise in each bite.
- Make it gluten-free: Substitute all-purpose flour with your favorite gluten-free blend.
How to Make Cannoli Cookies
Step 1: Preheat Your Oven
Preheating your oven to 350°F (175°C) is essential. It ensures that your cookies bake evenly and become perfectly golden brown.
Step 2: Prepare the Dough
In a large bowl, whisk together the flour and sugar until they are well blended. This step helps ensure that the sugar dissolves evenly throughout your dough for that lovely sweet flavor!
Step 3: Mix Wet Ingredients
In another bowl, mix together the ricotta, egg, vanilla, and lemon zest until smooth. This creamy mixture will be the heart of our delicious filling!
Step 4: Combine Mixtures
Gradually stir the flour mixture into the wet ingredients until a soft dough forms. It’s important not to over-mix; we want just enough blending so that everything comes together nicely.
Step 5: Let It Rest
Cover the dough and let it rest for about 30 minutes. This resting period allows the gluten to relax, making rolling out easier later on.
Step 6: Roll Out The Dough
Dust your work surface with flour and roll out the dough to about ¼ inch thick. Rolling it out evenly allows for consistent baking—no one likes an undercooked cookie!
Step 7: Cut The Shapes
Cut the dough into rectangles or squares, approximately 2×3 inches. These shapes will hold our tasty filling perfectly!
Step 8: Prepare The Filling
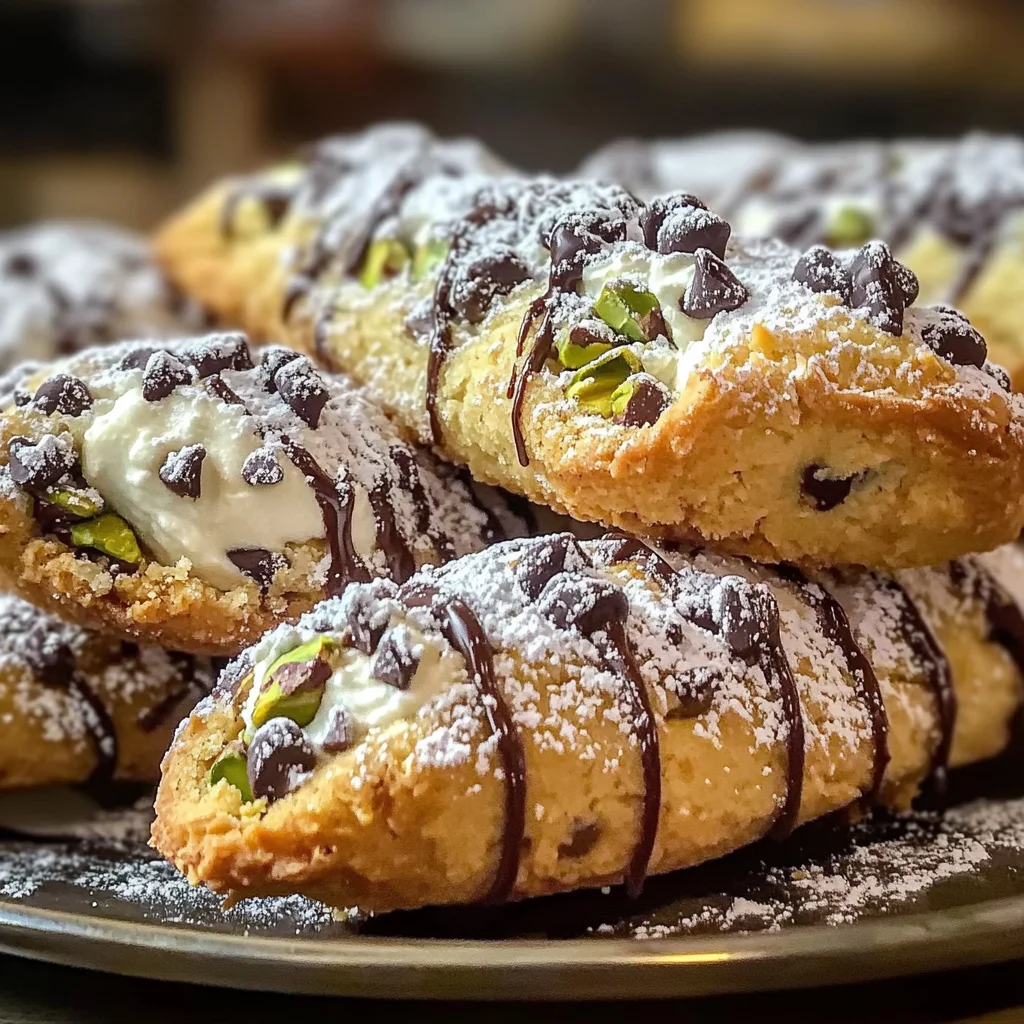
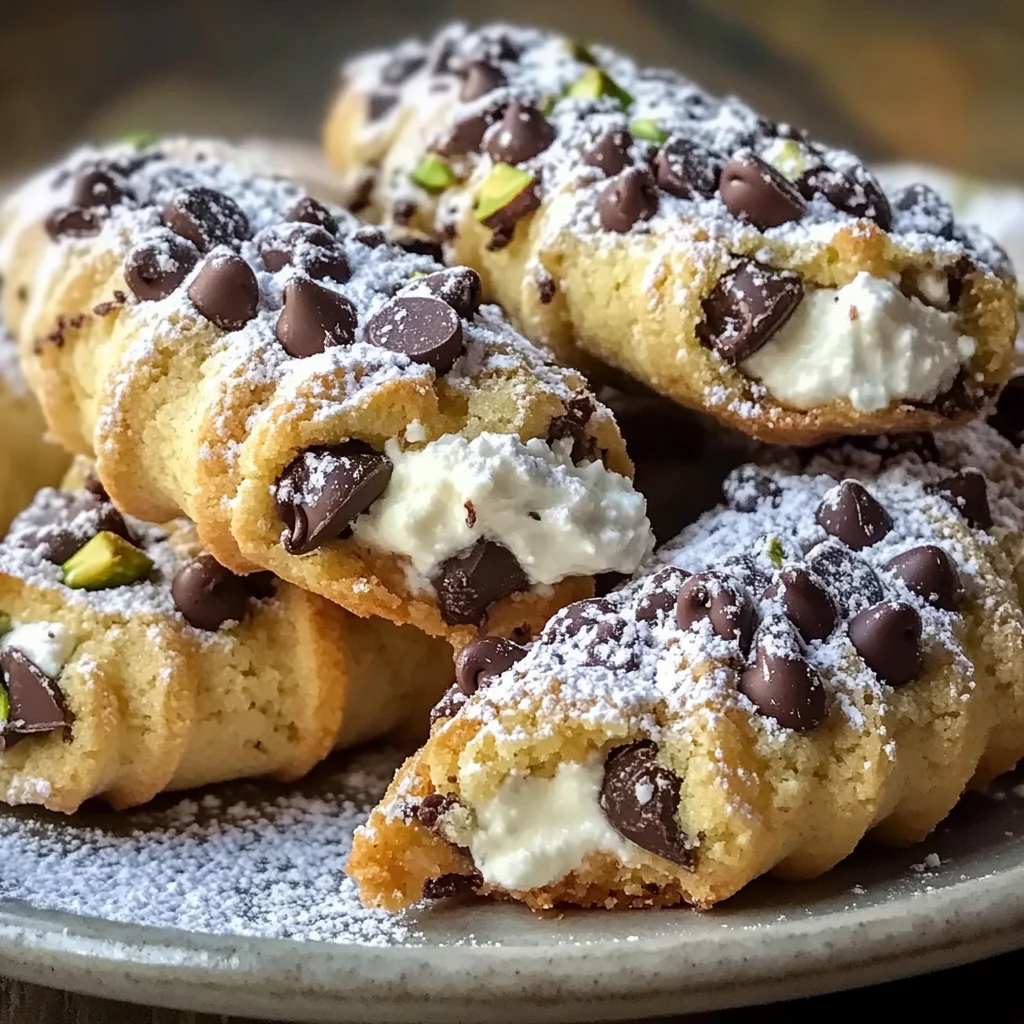
In a small bowl, mix together ricotta, mini chocolate chips, and chopped pistachios. This filling adds delightful flavor bursts in every bite!
Step 9: Fill And Seal
Place a spoonful of filling in the center of each rectangle and fold to seal. Make sure they are sealed well so that no delicious filling escapes during baking.
Step 10: Bake Your Cookies
Bake for about 15-18 minutes until golden brown. Keep an eye on them; every oven is different!
Step 11: Cool Down
Once baked, cool them on baking sheets for a few minutes before transferring them to a wire rack. This step helps set their shape while keeping them tender inside.
Enjoy your homemade Cannoli Cookies! They are sure to be a hit whether you share them with family or enjoy them all by yourself!
Pro Tips for Making Cannoli Cookies
Making Cannoli Cookies can be a delightful experience, and with these handy tips, you’ll ensure they turn out perfect every time!
-
Use room temperature ingredients: This helps the dough come together more easily and creates a smoother filling, resulting in a better texture overall.
-
Don’t overwork the dough: Mixing just until combined keeps the cookies tender and flaky. Overworking can lead to tough cookies.
-
Experiment with fillings: While the classic ricotta filling is delicious, feel free to try other additions like mascarpone or flavored extracts for a unique twist!
-
Adjust baking time based on your oven: Every oven is different, so keep an eye on your cookies as they bake. You want them golden, not overly browned.
How to Serve Cannoli Cookies
Serving Cannoli Cookies can be as fun as making them! Here are some ideas to present these delightful treats beautifully.
Garnishes
-
Powdered sugar dusting: A light sprinkle of powdered sugar adds visual appeal and sweetness without overwhelming the flavors.
-
Chocolate drizzle: Drizzling melted chocolate over the top before serving gives an elegant touch that enhances both taste and presentation.
Side Dishes
-
Fresh fruit salad: A refreshing mix of seasonal fruits complements the richness of the Cannoli Cookies, providing a light and healthy contrast.
-
Gelato or sorbet: The creamy texture of gelato or the fruity freshness of sorbet pairs perfectly with the cookies, making for an indulgent dessert experience.
-
Coffee or tea: Serving these cookies alongside a warm beverage enhances their flavors and gives you that cozy café vibe right at home.
Indulging in these Cannoli Cookies will surely satisfy your sweet cravings while impressing your friends and family. Enjoy every crispy, creamy bite!
Make Ahead and Storage
These Cannoli Cookies are perfect for meal prep, allowing you to enjoy a delightful treat whenever the craving strikes. Follow these simple tips to ensure your cookies stay fresh and delicious.
Storing Leftovers
- Store your Cannoli Cookies in an airtight container at room temperature for up to 3 days.
- For longer freshness, keep them in the refrigerator where they will last about a week.
- Be sure to add a dusting of powdered sugar just before serving for that extra touch of sweetness.
Freezing
- To freeze, arrange the cooled cookies in a single layer on a baking sheet and place them in the freezer until firm.
- Once frozen, transfer them to a freezer-safe bag or container and store for up to 3 months.
- When ready to enjoy, thaw at room temperature for a few hours or overnight in the fridge.
Reheating
- If you prefer warm cookies, preheat your oven to 300°F (150°C).
- Place the cookies on a baking sheet and heat for about 5-7 minutes until warmed through.
- Avoid microwaving as this can make them chewy instead of maintaining their delightful texture.
FAQs
Here are some common questions about making Cannoli Cookies.
Can I make Cannoli Cookies without ricotta cheese?
Yes! You can substitute ricotta cheese with mascarpone or cream cheese if you prefer. Just ensure the consistency is similar for the filling!
How do I store leftover Cannoli Cookies?
Store leftover Cannoli Cookies in an airtight container at room temperature for up to 3 days or refrigerate them for up to a week.
Can I freeze Cannoli Cookies?
Absolutely! Freeze them after baking by placing them in a single layer on a baking sheet. Once frozen, transfer them to a freezer-safe bag for up to 3 months.
What can I use instead of chocolate chips in Cannoli Cookies?
If you’re looking for alternatives, consider using dried fruits like raisins or cranberries, nuts, or even sprinkles for added color!
How do I achieve crispy edges on my Cannoli Cookies?
To get those delightful crispy edges, make sure not to overwork the dough and roll it thin. Also, ensure your oven is preheated well before baking!
Final Thoughts
I hope this recipe brings joy and sweetness into your kitchen! These Cannoli Cookies are not only easy to make but also offer that special touch of indulgence we all crave sometimes. Enjoy every bite and don’t hesitate to share your creations with family and friends! Happy baking!
Cannoli Cookies

Indulge in the delightful charm of Cannoli Cookies, a fantastic fusion of classic Italian flavors and cookie goodness. These sweet treats feature a crispy exterior that cradles a creamy ricotta filling, making them perfect for any occasion—whether it’s a cozy family dessert night or a festive gathering. With their easy preparation and customizable fillings, these cookies are sure to impress both novice bakers and seasoned pros alike. Enjoy the versatility of this recipe by adding your favorite mix-ins or toppings, ensuring every bite is just as unique as you are. Get ready to savor these irresistible Cannoli Cookies that will leave everyone asking for more!
- Prep Time: 20 minutes
- Cook Time: 18 minutes
- Total Time: 38 minutes
- Yield: Approximately 12 cookies 1x
- Category: Dessert
- Method: Baking
- Cuisine: Italian
Ingredients
- 1 cup all-purpose flour
- ½ cup granulated sugar
- ½ cup ricotta cheese
- 1 large egg
- 1 tsp vanilla extract
- 1 tsp lemon zest
- ½ cup mini chocolate chips
- ½ cup chopped pistachios
- Powdered sugar for dusting
Instructions
- Preheat your oven to 350°F (175°C).
- In a large bowl, whisk together the flour and sugar until well blended.
- In another bowl, mix the ricotta, egg, vanilla extract, and lemon zest until smooth.
- Gradually combine the wet ingredients with the dry ingredients until a soft dough forms.
- Cover and let the dough rest for about 30 minutes.
- Roll out the dough to about ¼ inch thick on a floured surface.
- Cut into rectangles approximately 2×3 inches.
- In a small bowl, mix ricotta with chocolate chips and pistachios for the filling.
- Spoon filling onto each rectangle and fold to seal securely.
- Bake for 15-18 minutes until golden brown.
- Cool on baking sheets for a few minutes before transferring to wire racks.
Nutrition
- Serving Size: 1 cookie (40g)
- Calories: 160
- Sugar: 7g
- Sodium: 55mg
- Fat: 6g
- Saturated Fat: 3g
- Unsaturated Fat: 2g
- Trans Fat: 0g
- Carbohydrates: 23g
- Fiber: 1g
- Protein: 3g
- Cholesterol: 35mg