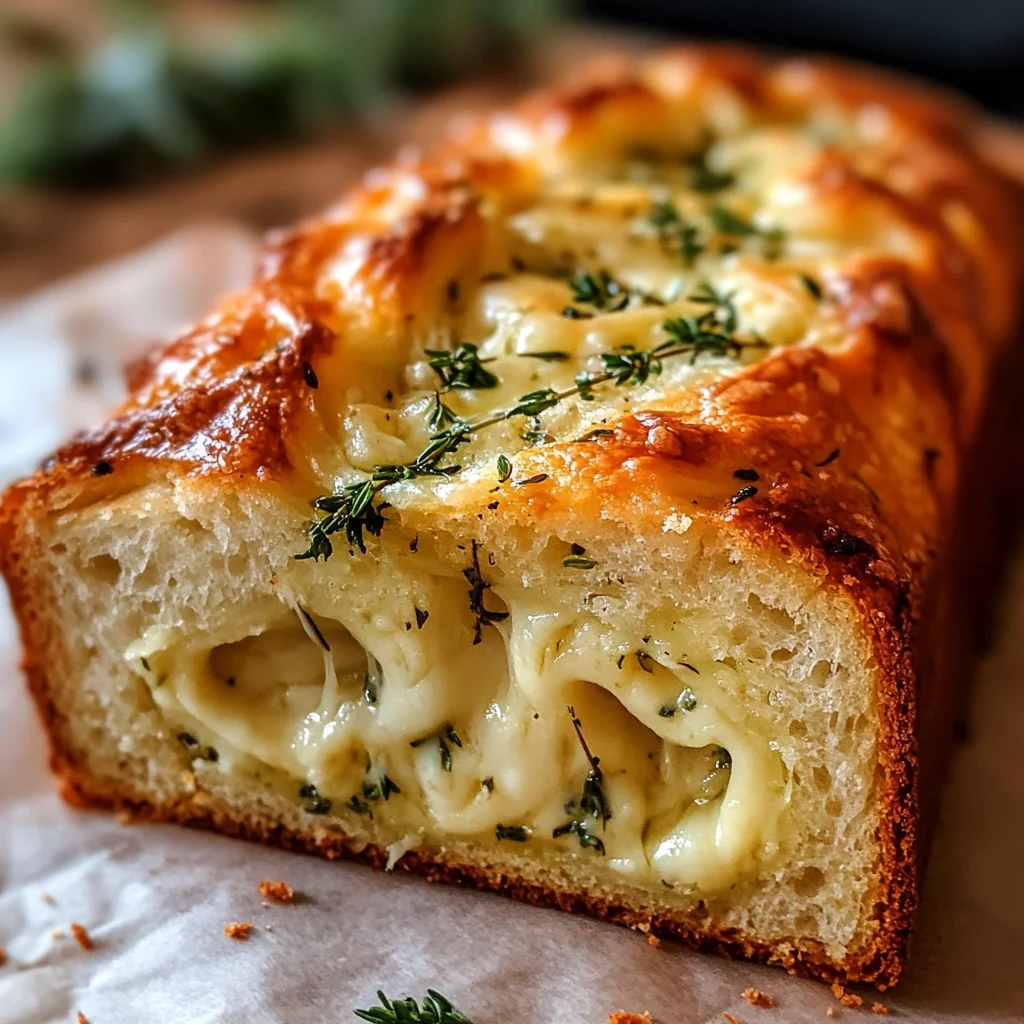
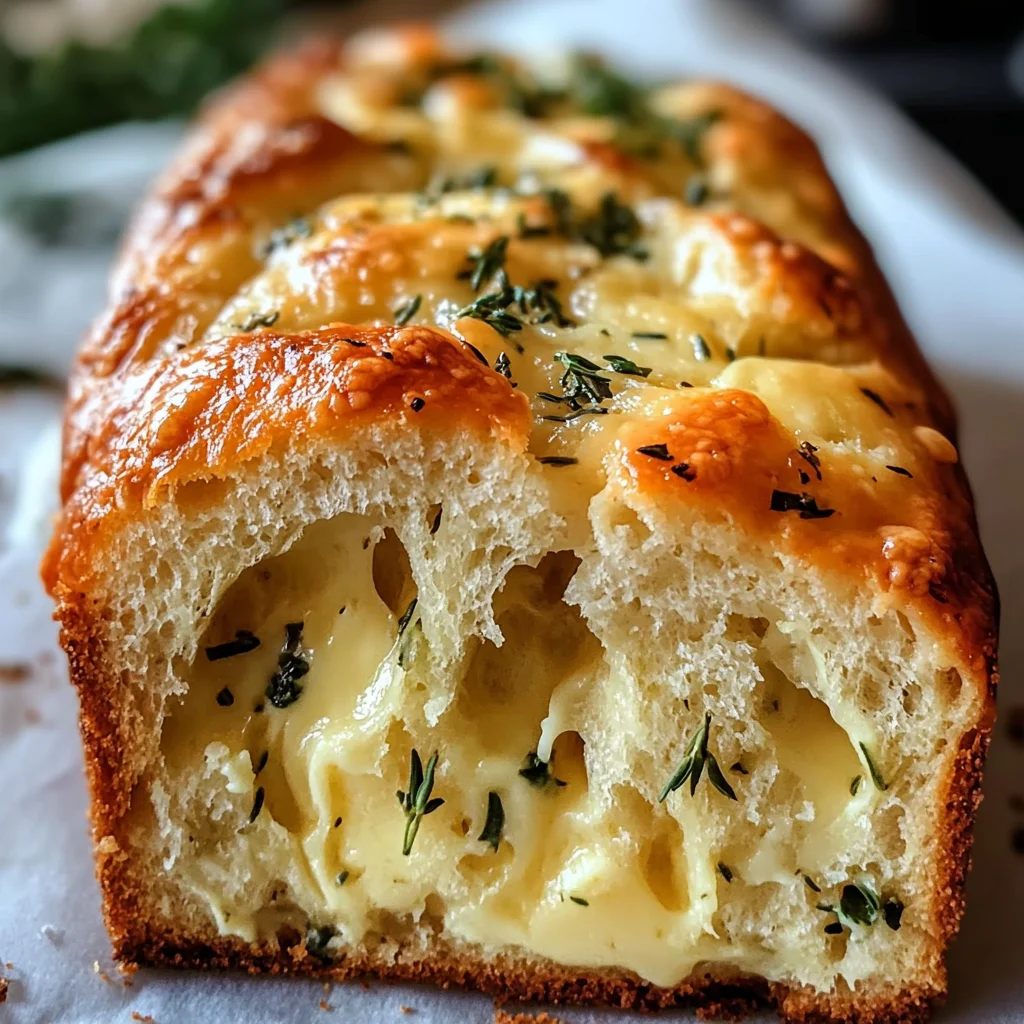
Cheese, Herb & Garlic Quick Bread (No Yeast)
If you’re looking for a cozy and comforting recipe that brings warmth to your kitchen, you’ve got to try this Cheese, Herb & Garlic Quick Bread (No Yeast). This delightful bread is perfect for busy weeknights or family gatherings, where everyone will appreciate its savory flavors. The combination of cheese, fresh herbs, and garlic creates a wonderful aroma that fills your home as it bakes. Trust me, once you slice into this bread, you’ll be met with a perfectly moist crumb that feels like a hug in every bite!
Why You’ll Love This Recipe
- Quick and Easy: No yeast means no waiting around! You can whip this up in no time.
- Family-Friendly: Kids and adults alike will love the cheesy goodness and herbaceous flavor.
- Versatile: Great as a side dish, snack, or even breakfast! Enjoy it warm or toasted.
- Make Ahead: This bread stores well and can be enjoyed throughout the week—if it lasts that long!
- Flavor Packed: The combination of cheese, herbs, and garlic makes each bite utterly delicious.
Ingredients You’ll Need
Gathering simple and wholesome ingredients makes cooking such a joy! For this Cheese, Herb & Garlic Quick Bread (No Yeast), you’ll want to make sure you have everything ready before you start. Here’s what you’ll need:
- 200 grams (7 ounces) of cheese (such as cheddar or tasty), sliced into approximately 3 millimeters (0.1 inch) thick pieces of varying widths for a rustic appearance. (See Note 1)
- 2 tablespoons of fresh rosemary (finely chopped)
- 2 tablespoons of fresh parsley leaves (finely chopped)
- 1 teaspoon of dried oregano
- ½ teaspoon of dried thyme
- 2 garlic cloves (crushed using a garlic press or finely grated)
- 3 tablespoons of extra virgin olive oil
- ½ teaspoon of cooking salt or kosher salt (use half the amount if using fine table salt)
- 2¼ cups of plain flour (all-purpose flour)
- 1 teaspoon of baking soda (or substitute with 3½ teaspoons of baking powder)
- ¾ teaspoon of cooking salt or kosher salt (halve the amount if using table salt)
- ½ cup of plain yogurt (Greek or regular, full-fat and unsweetened)
- ¾ cup of full-fat milk (low-fat may be substituted)
- 2 large eggs (approximately 50–55 grams or 2 ounces each)
- 50 grams (3½ tablespoons) of unsalted butter, melted
- 2 tablespoons of olive oil
- 2 small garlic cloves (crushed or grated)
Variations
This recipe is wonderfully flexible! Feel free to get creative with the ingredients based on what you have on hand or your personal taste preferences. Here are some fun variation ideas:
- Add Veggies: Toss in some finely chopped bell peppers or spinach for extra nutrition.
- Change the Cheese: Experiment with different cheeses like feta or gouda for unique flavors.
- Spice it Up: Add red pepper flakes for a bit of heat if you enjoy spice.
- Herb Swap: Use whatever fresh herbs you have available; basil or chives work beautifully too!
How to Make Cheese, Herb & Garlic Quick Bread (No Yeast)
Step 1: Preheat the Oven
Start by preheating your oven to 180°C (350°F). This is crucial because a well-heated oven ensures even baking. While it warms up, prepare your loaf pan by lightly greasing it with butter or oil spray and lining it with baking paper.
Step 2: Make the Herb Mixture
In a small bowl, combine the finely chopped rosemary, parsley, dried oregano, dried thyme, crushed garlic, extra virgin olive oil, and cooking salt. Mixing these together creates a fragrant herb blend that will infuse every slice with flavor. Aim for a thick consistency that’s dollop-able.
Step 3: Combine Dry Ingredients
In a medium bowl, whisk together the plain flour, baking soda (or baking powder), and salt until everything is thoroughly combined. This step ensures an even distribution of leavening agents and seasoning throughout your bread.
Step 4: Mix Wet Ingredients
In another bowl, whisk together the plain yogurt, milk, eggs, melted butter, olive oil, and additional crushed garlic until smooth. This mixture brings moisture to your bread while adding richness from the yogurt and eggs.
Step 5: Combine Wet and Dry Mixes
Create a well in the center of your dry ingredients and pour in the wet mixture. Gently mix until just combined; overmixing can lead to dense bread. You want to keep it light and airy!
Step 6: Layer It Up
Pour one-third of the batter into your prepared loaf pan. Dollop one-third of the herb mixture across the top and use a knife to create a gentle swirl pattern. Insert one-third of the cheese slices randomly into this layer. Repeat this layering process two more times for maximum flavor in each bite.
Step 7: Bake It Perfectly
Bake your loaf in the preheated oven for about 30 minutes until golden brown on top. Then cover it with aluminum foil and bake for an additional 20 minutes. To check if it’s done, insert a skewer into the center—it should come out clean!
Step 8: Cool Before Slicing
Let your loaf cool in the pan for five minutes before transferring it to a wire rack to cool for at least another ten minutes. This cooling period helps set its structure so you can slice it without crumbling. If desired, add butter to taste!
Enjoy every flavorful bite of this homemade Cheese, Herb & Garlic Quick Bread! It’s bound to become a favorite at your table just like it is at mine!
Pro Tips for Making Cheese, Herb & Garlic Quick Bread (No Yeast)
Making quick bread can be a fun and rewarding experience, especially when you follow these simple tips to elevate your baking game!
-
Use room temperature ingredients: This helps create a smoother batter and ensures even mixing, leading to a light and fluffy texture in your final bread.
-
Don’t overmix: Gently folding in the wet ingredients with the dry ones is crucial. Overmixing can lead to a dense loaf, so just mix until everything is combined for the best results.
-
Experiment with different cheeses: While cheddar is delicious, trying other varieties like Gruyère or feta can add unique flavors and textures to your bread. Each cheese brings something special to the table!
-
Add extra herbs: Feel free to play around with additional herbs or spices such as basil or chili flakes. This personalization not only enhances flavor but also makes the bread uniquely yours.
-
Cool before slicing: Allowing the bread to cool on a wire rack helps it set properly and prevents it from becoming gummy when sliced. Patience pays off for that perfect slice!
How to Serve Cheese, Herb & Garlic Quick Bread (No Yeast)
This delightful quick bread is not only delicious but also incredibly versatile! Here are some ideas on how to present and enjoy it.
Garnishes
- Fresh herbs: A sprinkle of chopped parsley or rosemary on top adds a pop of color and freshness, enhancing both presentation and flavor.
- Olive oil drizzle: A light drizzle of high-quality extra virgin olive oil right before serving adds richness and ties together the dish beautifully.
Side Dishes
- Mixed Green Salad: A light salad with fresh greens, tomatoes, and a citrus vinaigrette complements the savory flavors of the bread while adding a refreshing crunch.
- Vegetable Soup: Pairing this quick bread with a warm vegetable soup creates a comforting meal perfect for chilly days. The combination offers both warmth and heartiness.
- Roasted Vegetables: Serve alongside an assortment of roasted seasonal vegetables for added texture and flavor. The caramelization pairs wonderfully with the herb-infused bread.
- Dipping Sauces: Consider offering a small dish of hummus or tzatziki for dipping. These creamy accompaniments enhance each bite and make for an interactive dining experience.
Enjoy every slice of your Cheese, Herb & Garlic Quick Bread (No Yeast)—it’s bound to be a hit at any gathering or as a cozy comfort food at home!
Make Ahead and Storage
This Cheese, Herb & Garlic Quick Bread is perfect for meal prep! You can easily make it ahead of time and store it for future enjoyment. Here’s how to keep it fresh:
Storing Leftovers
- Allow the bread to cool completely before storing.
- Wrap the loaf tightly in plastic wrap or aluminum foil.
- Place it in an airtight container or a resealable plastic bag.
- Store at room temperature for up to 3 days.
Freezing
- Slice the bread into individual portions for easy thawing.
- Wrap each slice tightly in plastic wrap, then in aluminum foil.
- Place wrapped slices in a freezer-safe bag or container.
- Freeze for up to 3 months. Remember to label with the date!
Reheating
- For best results, thaw slices in the refrigerator overnight before reheating.
- To reheat, place slices on a baking sheet at 180°C (350°F) for about 10-15 minutes until warmed through.
- Alternatively, microwave individual slices on a microwave-safe plate for about 20-30 seconds.
FAQs
Here are some common questions you might have about making this delightful quick bread!
Can I use different types of cheese in Cheese, Herb & Garlic Quick Bread (No Yeast)?
Absolutely! While cheddar is delicious, feel free to experiment with other cheeses such as mozzarella, gouda, or feta. Just ensure they melt well and complement the herbs.
How can I customize my Cheese, Herb & Garlic Quick Bread (No Yeast)?
Customization is key! You can add different herbs like thyme or basil, incorporate sun-dried tomatoes for a burst of flavor, or even add nuts for extra texture. Get creative!
Can I substitute plain yogurt with something else?
Yes! If you don’t have yogurt on hand, you can use sour cream or even a dairy-free yogurt alternative. These will still give you that lovely moisture and tanginess.
What if I don’t have fresh herbs?
No worries! You can substitute dried herbs; just remember that dried herbs are more concentrated. Use about one-third of the amount listed for fresh herbs.
How do I ensure my quick bread turns out fluffy?
Be careful not to overmix your batter once you combine the wet and dry ingredients. Gently folding them together helps retain air bubbles, ensuring your bread stays light and fluffy!
Final Thoughts
I hope you find joy in making this Cheese, Herb & Garlic Quick Bread (No Yeast) as much as I do! It’s perfect for sharing with loved ones or enjoying as a cozy snack any time of day. Remember, every slice is packed with flavor and warmth—just waiting to be enjoyed by you. Happy baking!
Cheese, Herb & Garlic Quick Bread (No Yeast)

Indulge in the warmth and comfort of Cheese, Herb & Garlic Quick Bread (No Yeast). This delightful bread combines savory cheese, aromatic herbs, and a hint of garlic for a truly irresistible treat. Perfect for busy weeknights or family gatherings, this quick bread is easy to prepare and requires no yeast—making it an ideal option for those looking to whip up something delicious without the wait. Slice into a loaf that is moist, fluffy, and bursting with flavor. Whether enjoyed warm as a side dish, toasted for breakfast, or paired with a hearty soup, every bite feels like a cozy hug.
- Prep Time: 20 minutes
- Cook Time: 50 minutes
- Total Time: 1 hour 10 minutes
- Yield: Approximately 10 servings 1x
- Category: Dinner
- Method: Baking
- Cuisine: American
Ingredients
- 200g cheese (cheddar or your choice)
- 2 tablespoons fresh rosemary
- 2 tablespoons fresh parsley
- 2 garlic cloves (crushed)
- 3 tablespoons extra virgin olive oil
- 2¼ cups plain flour
- 1 teaspoon baking soda
- ½ cup plain yogurt
- ¾ cup full-fat milk
- 2 large eggs
- 50g unsalted butter (melted)
Instructions
- Preheat oven to 180°C (350°F). Grease and line a loaf pan.
- In a bowl, mix rosemary, parsley, garlic, olive oil, and salt to create the herb mixture.
- Whisk together flour, baking soda, and salt in another bowl.
- In a separate bowl, mix yogurt, milk, eggs, melted butter until smooth.
- Combine wet and dry ingredients gently until just mixed.
- Layer one-third of batter in the loaf pan. Add one-third of herb mixture and cheese slices. Repeat twice more.
- Bake for about 30 minutes; cover with foil and bake an additional 20 minutes until cooked through.
- Cool for at least ten minutes before slicing.
Nutrition
- Serving Size: 1 serving
- Calories: 140
- Sugar: 0g
- Sodium: 250mg
- Fat: 7g
- Saturated Fat: 3g
- Unsaturated Fat: 4g
- Trans Fat: 0g
- Carbohydrates: 14g
- Fiber: 0g
- Protein: 5g
- Cholesterol: 55mg