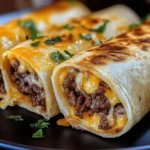
Cheesy Garlic Beef Roll-Ups
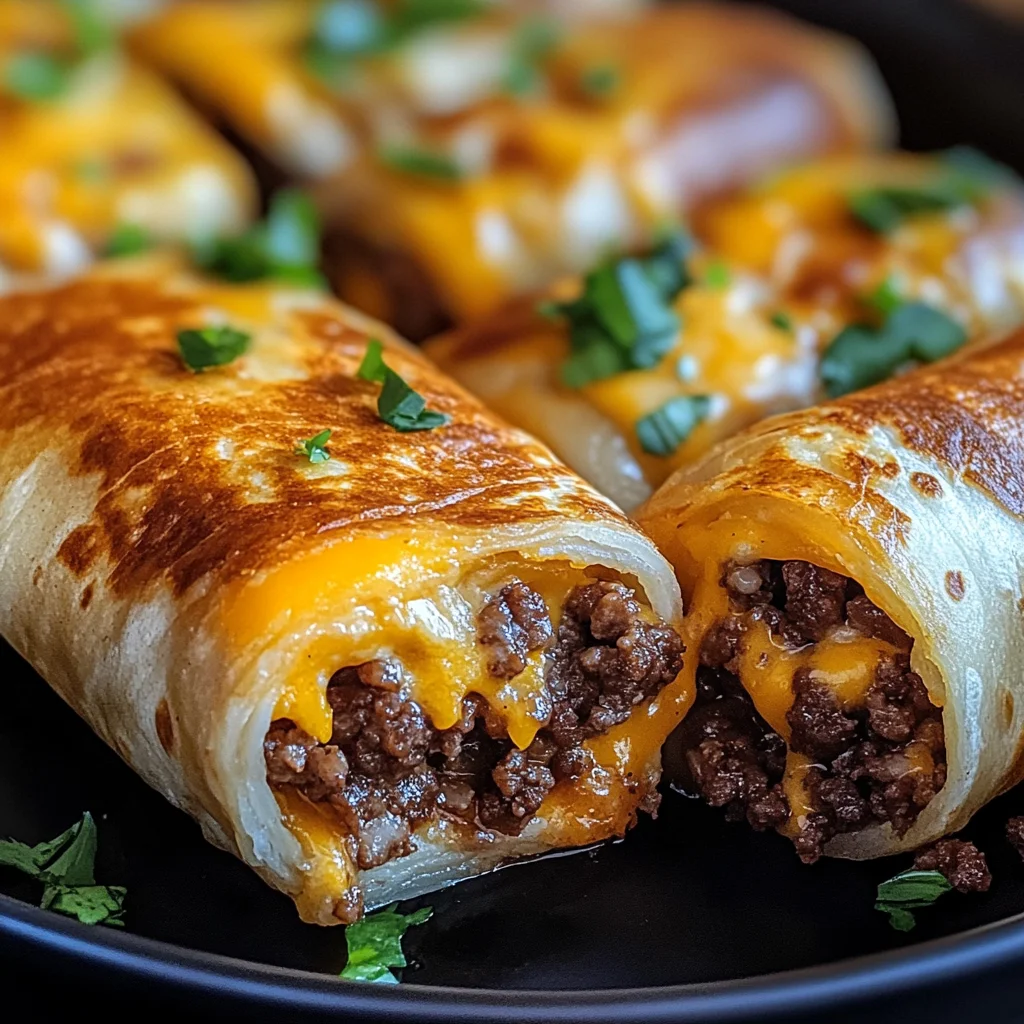
If you’re looking for a delightful dish that brings warmth and comfort to your table, let me introduce you to my Cheesy Garlic Beef Roll-Ups. These little treasures are not just a recipe; they’re an experience! Perfect for busy weeknights or family gatherings, they combine the savory goodness of seasoned ground beef with a melty cheese blend, all wrapped in soft tortillas and brushed with garlic butter. Every bite is a burst of flavor that can turn any meal into a celebration!
Whether you’re hosting friends for game day or simply need something satisfying for dinner, these roll-ups will impress everyone around the table. Trust me, once you try them, they’ll become a go-to favorite in your home.
Why You’ll Love This Recipe
- Quick and Easy: With just 30 minutes from start to finish, you can whip these up even on the busiest nights!
- Family-Friendly: Kids and adults alike adore cheesy, flavorful dishes—these roll-ups are sure to please.
- Make-Ahead Convenience: Prepare the filling in advance and assemble them when you’re ready to bake.
- Versatile Enjoyment: Whether as an appetizer or a main dish, these roll-ups fit perfectly into any meal plan.
- Deliciously Comforting: The blend of cheeses and spices creates a rich flavor that makes every bite satisfying.
Ingredients You’ll Need
These cheesy garlic beef roll-ups use simple and wholesome ingredients that you might already have on hand. Let’s gather what we need!
For the Filling
- 1 lb ground beef
- ½ cup shredded cheddar cheese
- ½ cup shredded mozzarella cheese
- 1 tablespoon olive oil
- 1 tablespoon Worcestershire sauce
- 1 teaspoon onion powder
- 1 teaspoon garlic powder
- ½ teaspoon smoked paprika
- Salt and black pepper, to taste
For Assembly
- 4 large flour tortillas
- ¼ cup butter, melted
- 3 cloves garlic, minced
Optional Garnish
- Sliced pickles for garnish
Variations
This recipe is wonderfully flexible! Feel free to get creative with your ingredients:
- Swap the protein: Use ground turkey or chicken instead of beef for a lighter option.
- Add veggies: Toss in some sautéed bell peppers or spinach for extra nutrition.
- Change up the cheeses: Try pepper jack for a spicy kick or use dairy-free cheese alternatives if needed.
- Make it spicy: Add diced jalapeños or red pepper flakes to the beef mixture for some heat.
How to Make Cheesy Garlic Beef Roll-Ups
Step 1: Preheat Your Oven
Start by preheating your oven to 375°F (190°C). This ensures that your roll-ups bake evenly and turn out perfectly golden.
Step 2: Brown the Beef
In a large skillet over medium-high heat, add olive oil. Once hot, throw in your ground beef. Cook it until browned, breaking it up with a spatula—this should take about 7–8 minutes. Browning the meat is key; it adds depth of flavor that makes these roll-ups irresistible!
Step 3: Season Your Mixture
Once the beef is nicely browned, stir in Worcestershire sauce, onion powder, garlic powder, smoked paprika, salt, and pepper. Mix well and then remove from heat. It’s important to let this mixture cool slightly so it doesn’t make your tortillas soggy when you assemble.
Step 4: Prepare Garlic Butter
In a small bowl, combine melted butter with minced garlic. Give it a good stir and set aside—this garlicky goodness will elevate your roll-ups!
Step 5: Assemble the Roll-Ups
Lay your tortillas flat on a clean surface. Evenly distribute the cooled beef mixture over each tortilla and top with both cheddar and mozzarella cheeses. Rolling them tightly helps keep all that delicious filling snug inside!
Step 6: Brush with Garlic Butter & Bake
Place each rolled tortilla seam-side down on a lined baking sheet. Brush generously with the garlic butter mixture—this adds flavor and helps achieve that lovely golden color. Bake for about 12–15 minutes until they are golden brown and bubbly.
Step 7: Serve & Enjoy!
Let them cool slightly before slicing into pinwheels if you like. Garnish with sliced pickles if desired! Serve warm and watch them disappear at your next gathering!
Now go ahead—give these Cheesy Garlic Beef Roll-Ups a try! They’re bound to become one of your favorites too!
Pro Tips for Making Cheesy Garlic Beef Roll-Ups
Ready to take your Cheesy Garlic Beef Roll-Ups to the next level? Here are some pro tips to ensure they turn out perfectly every time!
-
Use fresh spices: Fresh spices can elevate the flavor profile of your roll-ups. Consider using freshly minced garlic or herbs to enhance the overall taste.
-
Don’t overfill: While it may be tempting to stuff each tortilla with as much filling as possible, too much will make rolling difficult and lead to spills during baking. Aim for a balanced amount for easy handling.
-
Allow cooling time: Letting the beef mixture cool slightly before assembling helps prevent the tortillas from becoming soggy and makes them easier to roll.
-
Experiment with cheeses: Feel free to mix and match cheeses based on your preferences. Creamy Monterey Jack or a zesty pepper jack can add exciting flavors to these roll-ups.
-
Serve immediately for best results: For that irresistible melty cheese experience, serve the roll-ups right after baking. They’re at their best when warm and gooey!
How to Serve Cheesy Garlic Beef Roll-Ups
Presentation can elevate your dish from simple to spectacular! Here are some ideas on how to serve your Cheesy Garlic Beef Roll-Ups that will impress your family and friends.
Garnishes
-
Chopped fresh parsley: A sprinkle of fresh parsley adds a pop of color and a fresh flavor that complements the richness of the roll-ups.
-
Sliced jalapeños: For those who enjoy a little heat, garnishing with sliced jalapeños will add spice and excitement!
-
Dollop of sour cream or yogurt: A creamy dip on the side balances the savory flavors beautifully while adding a cool contrast.
Side Dishes
-
Spanish rice: This flavorful rice dish is seasoned with tomatoes, onions, and spices, making it a perfect companion that pairs well with the cheesy roll-ups.
-
Guacamole: Creamy guacamole offers rich flavors and healthy fats while adding a refreshing touch alongside the hearty roll-ups.
-
Simple green salad: A light salad with mixed greens, cherry tomatoes, and vinaigrette provides a crisp contrast and adds freshness to your meal.
-
Corn on the cob: Grilled or boiled corn on the cob brings sweetness and texture that complements the savory flavors of the beef roll-ups wonderfully.
Enjoy creating and sharing these delicious Cheesy Garlic Beef Roll-Ups! They’re sure to become a favorite at any gathering or family dinner.
Make Ahead and Storage
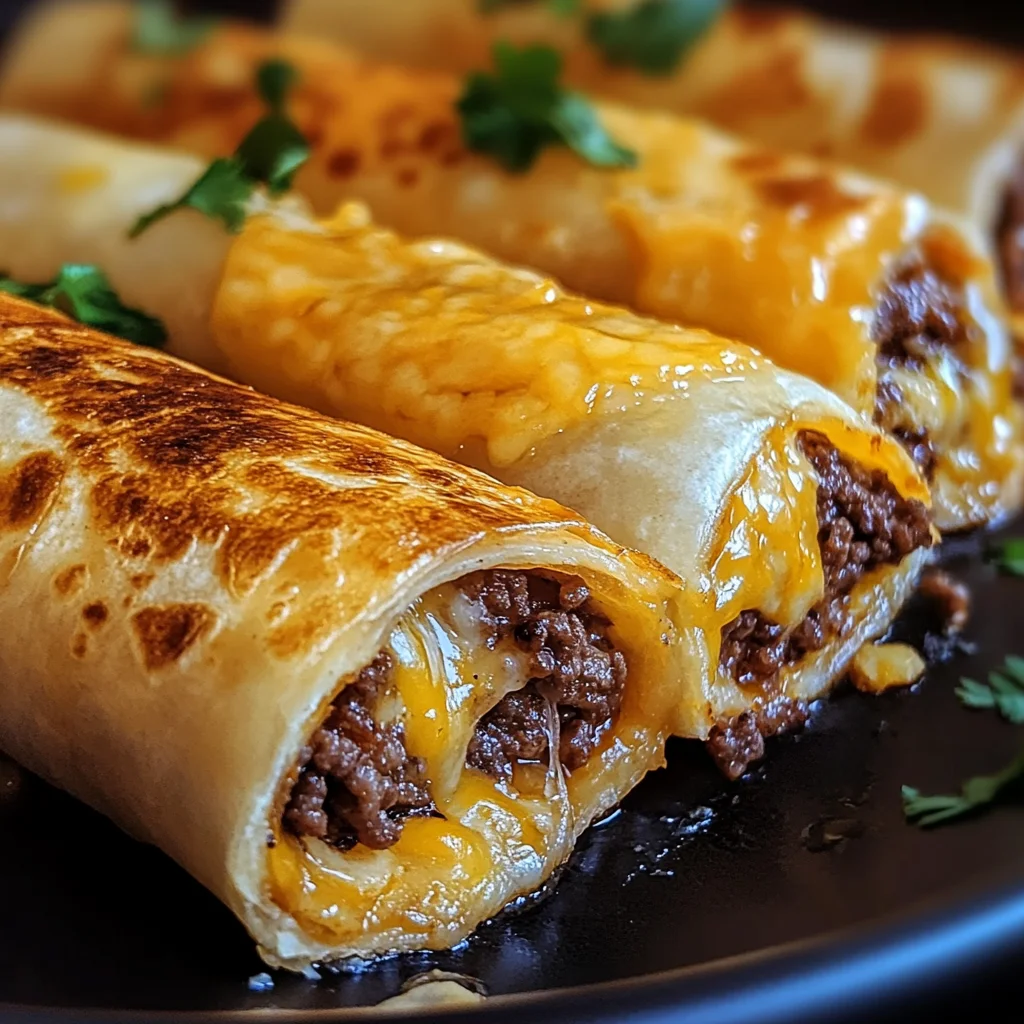
These Cheesy Garlic Beef Roll-Ups are not only delicious but also fantastic for meal prep. You can easily make them ahead of time, ensuring you have a savory option ready for busy days or gatherings.
Storing Leftovers
- Allow the roll-ups to cool completely before storing.
- Place them in an airtight container in the refrigerator.
- Enjoy leftovers within 3-4 days for the best flavor and texture.
Freezing
- Wrap each roll-up tightly in plastic wrap or aluminum foil.
- Place wrapped roll-ups in a freezer-safe bag or container.
- Label with the date and freeze for up to 2 months.
Reheating
- For best results, reheat in an oven preheated to 350°F (175°C) for about 10-15 minutes until warmed through.
- Alternatively, you can microwave them on medium power for about 1-2 minutes, but this may result in a softer texture.
FAQs
Here are some common questions about making these delectable Cheesy Garlic Beef Roll-Ups:
Can I use other types of cheese for Cheesy Garlic Beef Roll-Ups?
Absolutely! Feel free to experiment with different cheeses like pepper jack for a spicy kick or mozzarella for extra stretchiness. Just remember to keep it cheesy!
How do I make Cheesy Garlic Beef Roll-Ups gluten-free?
To make this recipe gluten-free, simply swap out the flour tortillas for gluten-free tortillas. The filling remains the same, so you’ll still get all that cheesy goodness!
Can I add vegetables to my Cheesy Garlic Beef Roll-Ups?
Yes! Chopped bell peppers, spinach, or mushrooms can be great additions. Just sauté them along with the ground beef to incorporate those flavors!
Final Thoughts
I truly hope you enjoy making these Cheesy Garlic Beef Roll-Ups as much as I do! They are perfect for family dinners, game day snacks, or even a cozy movie night. With their gooey cheese and savory beef, they’re bound to become a favorite in your home. Don’t hesitate to reach out with your thoughts or variations—you might inspire someone else! Happy cooking!
Cheesy Garlic Beef Roll-Ups
Indulge in the irresistible flavors of Cheesy Garlic Beef Roll-Ups, a perfect blend of seasoned ground beef, melty cheese, and buttery garlic goodness. This easy-to-make dish is ideal for family dinners, game day gatherings, or cozy movie nights. With just a handful of simple ingredients and minimal prep time, these roll-ups will quickly become a beloved staple in your home. Each bite delivers a satisfying crunch followed by a burst of cheesy richness that will delight everyone at your table.
- Prep Time: 10 minutes
- Cook Time: 15 minutes
- Total Time: 25 minutes
- Yield: Serves 4
- Category: Dinner
- Method: Baking
- Cuisine: Tex-Mex
Ingredients
- 1 lb ground beef
- ½ cup shredded cheddar cheese
- ½ cup shredded mozzarella cheese
- 4 large flour tortillas
- ¼ cup butter, melted
- 3 cloves garlic, minced
- 1 tablespoon olive oil
- 1 teaspoon onion powder
- 1 teaspoon garlic powder
- ½ teaspoon smoked paprika
- Salt and black pepper, to taste
Instructions
- Preheat oven to 375°F (190°C).
- In a skillet over medium-high heat, add olive oil and brown the ground beef for about 7–8 minutes.
- Stir in Worcestershire sauce, onion powder, garlic powder, smoked paprika, salt, and pepper; mix well and let cool slightly.
- Combine melted butter with minced garlic in a bowl.
- Lay tortillas flat; distribute the beef mixture evenly on each and top with cheeses. Roll tightly.
- Place seam-side down on a baking sheet and brush with garlic butter.
- Bake for 12–15 minutes until golden brown.
Nutrition
- Serving Size: 1 roll-up (approximately 150g)
- Calories: 370
- Sugar: 1g
- Sodium: 780mg
- Fat: 24g
- Saturated Fat: 11g
- Unsaturated Fat: 10g
- Trans Fat: 0g
- Carbohydrates: 23g
- Fiber: 1g
- Protein: 18g
- Cholesterol: 60mg

